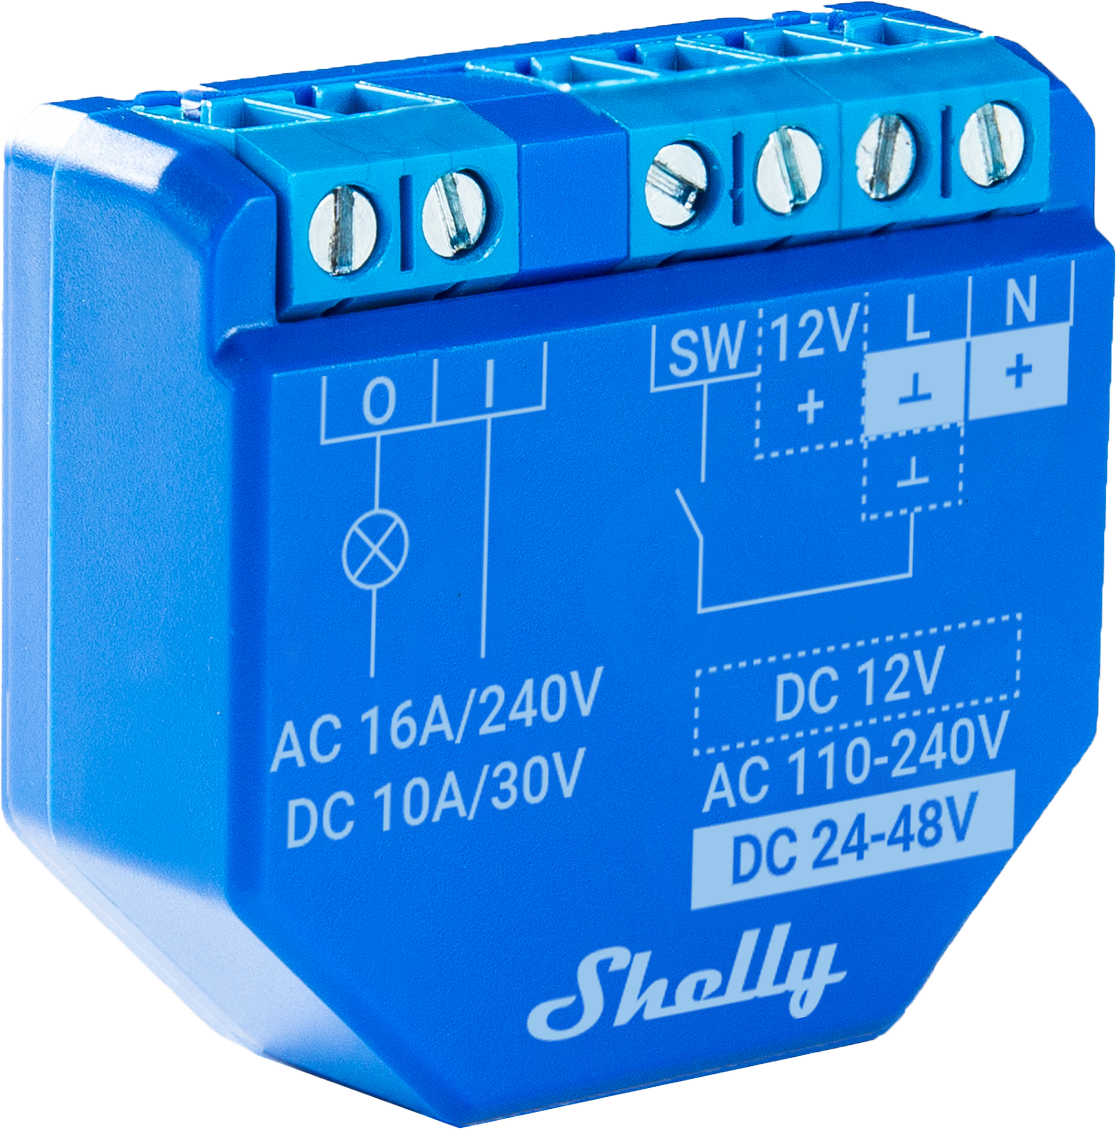
The Shelly 1L is the Shelly relay that works without a neutral wire — the situation in most older installations, where only the live wire reaches the switch box. This post covers both ways to wire it into a two way switch circuit (called a 3-way switch in the US): new cabling, and retrofitting the two-way wiring that is already in the wall. On top of making the light switchable from your phone, you get timers — useful on a staircase, where the light can turn itself off after a set period.
Before you open the switch box
This is mains wiring. Switch off the circuit at the consumer unit, verify with a tester that the conductors are actually dead, and work to whatever your local regulations require — in many countries this work has to be done or signed off by a qualified electrician. Nothing below replaces that.
What makes the Shelly 1L different
The Shelly 1L is the no-neutral variant, and that single difference drives every limitation it has. Instead of being powered between live and neutral, it draws its own supply through the connected lamp, which means a trickle of current flows even when the light is "off".
From the manufacturer's specification:
| Parameter | Value |
|---|---|
| Max switching voltage AC | 250 V |
| Max switching current AC | 4.1 A (5 A peak) |
| Minimum load without a neutral | 20 W resistive |
That last row is the one that catches people. Two 5 W LED bulbs do not add up to 20 W, so the device cannot keep itself powered and you get the classic symptoms: the lamp glows faintly when switched off, flickers, or the relay chatters. The fix is a bypass fitted at the lamp, which gives the Shelly a path to draw its supply without pushing enough current through the LED driver to light it. If you have a neutral available, the plain Shelly 1 is the simpler device and none of this applies.
Case 1: you are planning the wiring now
If you are running new cable, installing the Shelly 1L in a two way arrangement is straightforward — and you do not even need two way switches. Use ordinary switches or momentary (push) switches and wire them in parallel into the same input:

This converts a simple single switch into two way switching without a single two way switch in the circuit. Set the button type to match what you fitted:
- momentary (push) switches → Momentary
- ordinary switches → Edge Switch
And you are not limited to two. Any number of switches in parallel works, because the Shelly reads them as one input.
Case 2: you already have two way wiring in the walls
This is the more common case: the cabling is in the wall, it works, and you want to make it smart without re-running anything. That is easy with a Shelly 1L.
The existing wiring looks like this — two changeover switches with a pair of travellers between them:
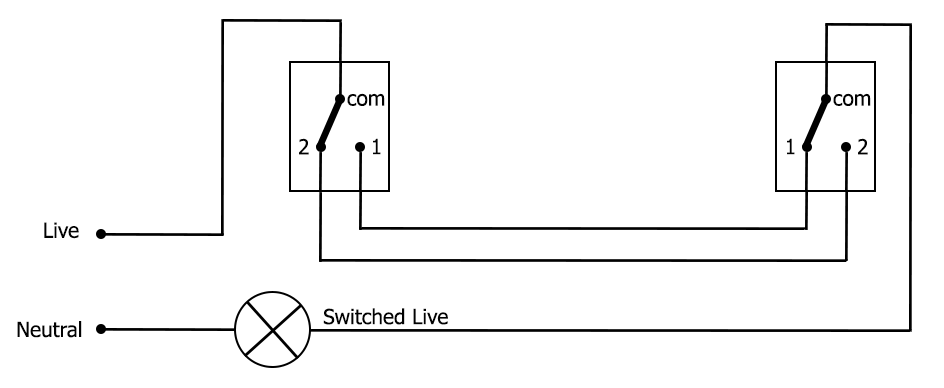
And this is how it becomes a Wi-Fi controlled two way switch with the Shelly 1L:
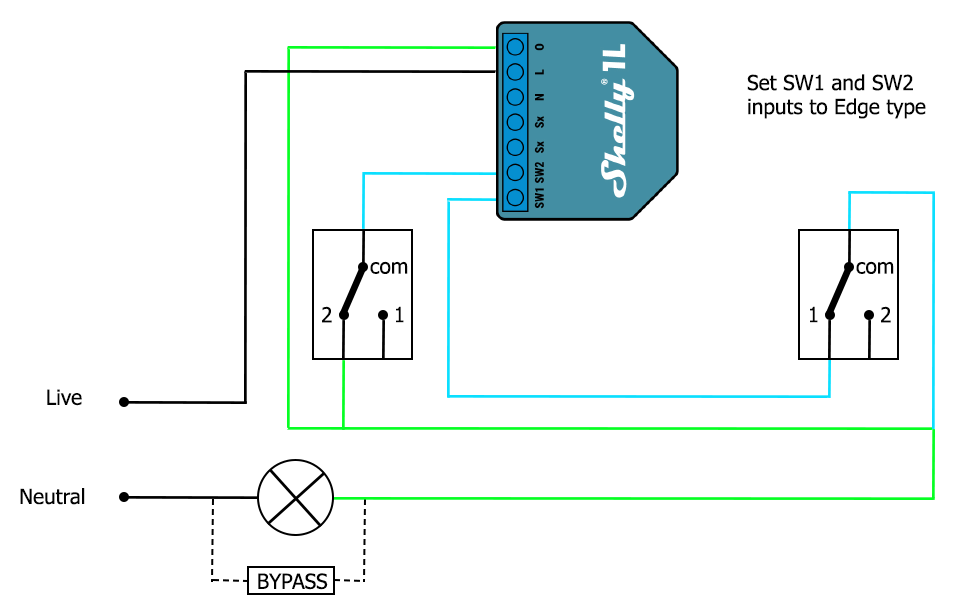
As simple as that. Two things to note:
- Keeping your existing switches means setting SW1 and SW2 to Edge type. With that setting you can also use plain single way switches, so a later replacement does not have to be a changeover switch.
- The second traveller pin is no longer used. Each switch now feeds one Shelly input instead of passing line voltage to the other switch, which is what lets the relay — not the switches — decide the state of the lamp.
Choosing the right button type
This setting is under the device settings in the Shelly app or the web interface, and getting it wrong is the most common reason a correctly wired Shelly behaves oddly.
| Type | Use it with | Behaviour |
|---|---|---|
| Edge Switch | ordinary switches (the case above) | every change of position toggles the relay |
| Toggle Switch | ordinary switches | the relay follows the switch position |
| Momentary | push buttons | a press toggles the relay |
| Detached | either | the input no longer drives the relay: use it when a switch should trigger a scene or another device instead of this light |
Edge is the one you want for two ordinary switches. Toggle would mean the lamp can only be on when the switch is physically up, so turning it on from your phone would fight the switch position.
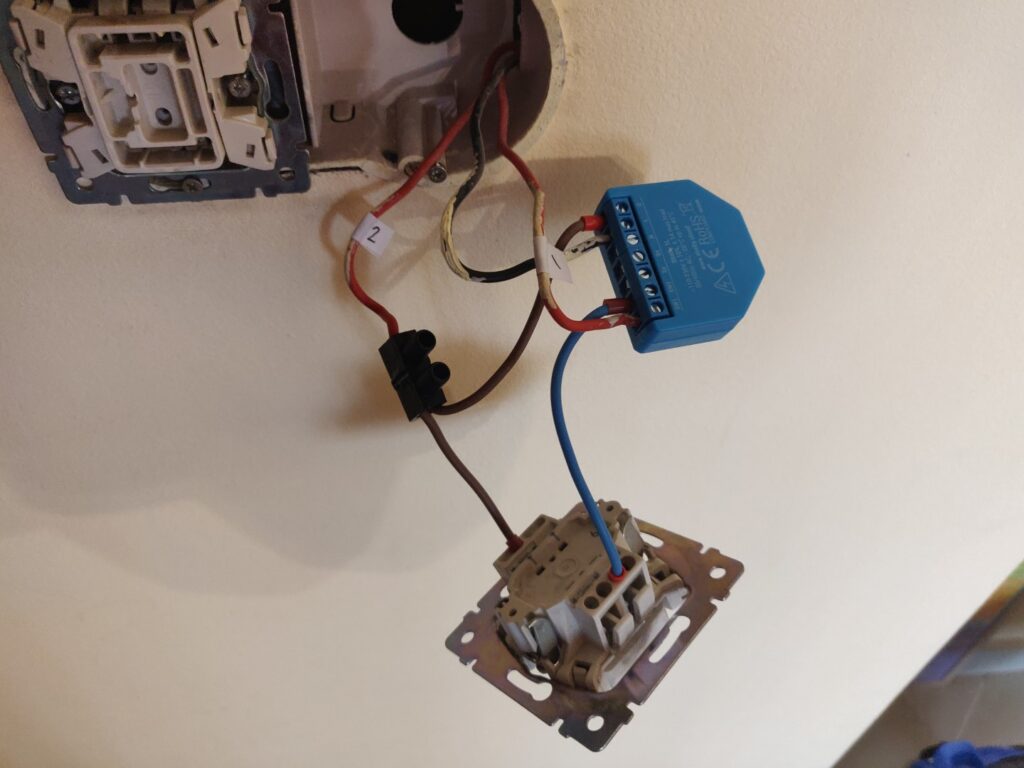
How it looks once installed
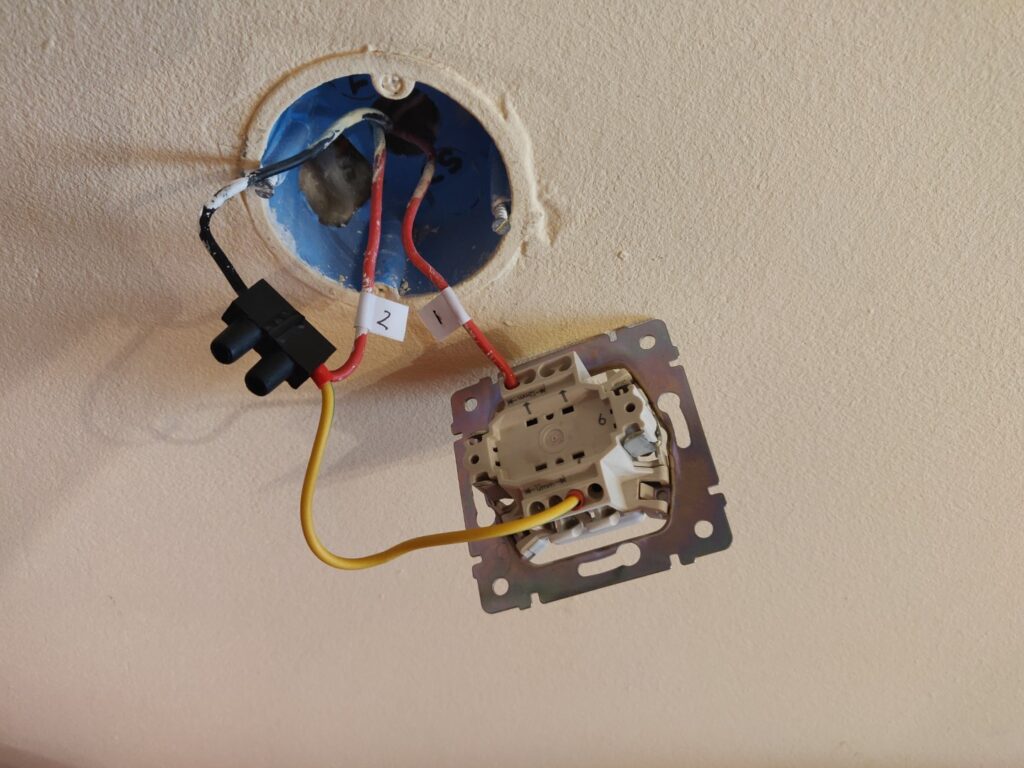
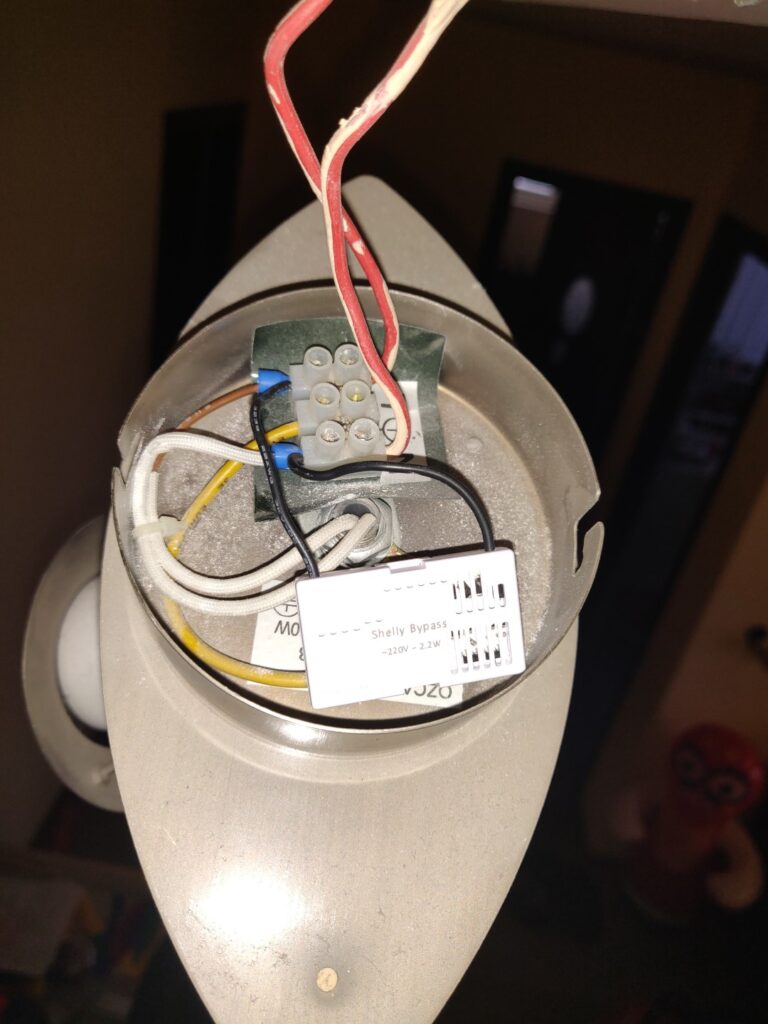
Verify it before you close the wall
One thing to settle before the wall plate goes back on: the Shelly 1L joins 2.4 GHz Wi-Fi only. If your access point broadcasts a single combined 2.4/5 GHz SSID, confirm there is 2.4 GHz coverage at the switch box while you can still reach the device.
Restore power and check, in this order:
- The Shelly appears in the app and reports as connected.
- The light toggles from the app.
- The light toggles from each physical switch independently — this is what proves both SW inputs are wired and configured.
- Switch the light off and look at it for a minute in the dark. No glow, no flicker.
- Toggle it twenty or thirty times from both switches. Intermittent supply problems show up as a device that drops off Wi-Fi, not as a light that fails.
Only after step 4 and 5 should the wall plate go back on.
Troubleshooting
The lamp glows faintly or flickers when off. The load is under the 20 W minimum, so the device is drawing its supply through the LED driver. Fit a bypass at the lamp, or use a higher-wattage lamp.
One switch works, the other does nothing. That input is not wired, or its button type is not set. Check SW2 in the settings, not the wiring, first — it is the faster of the two to test.
The light only comes on when the switch is in one position. The button type is set to Toggle instead of Edge.
The relay clicks repeatedly. The device is browning out under a load that is too small, or a bypass is fitted where the load is already large enough. Remove the bypass and retest with a known resistive load.
Bonus: the staircase timer
The reason to do this on a stairwell rather than a table lamp: in the device settings, set an auto-off timer. The light then switches itself off a fixed number of seconds after it goes on, from whichever switch. That works entirely inside the Shelly 1L, so it keeps working when your Wi-Fi or your hub does not.
